

Even more make up: Stickers and striping
We were talking about 'wrapping' cars yesterday. But stickers and striping are less invasive. But the result depends on the approach.
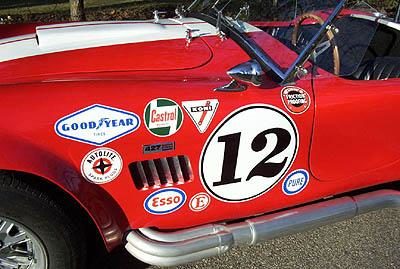
The stickers that are often used are the stickers with foil on them for applying - rubbing the sticker. That foil layer also keeps the lettering or emblems in place. Just think about what a fiddling it used to be to create a text with separate 'pick up' letters. We remember an emphatic. 'Turbo' designation where the letters were not on line and where the spaces between the letters were also done rather loosely. But that used to be.
Nowadays there are perfect sticker sheets for almost all classic cars and motorbikes. Bear in mind that in the eyes of purists stuck striping is like cursing in the church. Fortunately, there are still specialists who can pull rushes out of hand. With a marten hair brush of course.
But sticking might just be the option.
There is an incredible range of ready-made stickers. But if you cannot find what you are looking for, you can always consult a professional letterer. With its cutting computer and software, it is usually unable to make real-life (composite) stickers.
How do we approach that?
First of all it is of course important that you know exactly where the striping or sticker should be stuck. This is especially important if you work with multiple stickers. That is a matter of measuring and ensuring that the stickers are on the same places on the left and right. Mark the location with loosely taped painter's tape. Place reference lines on the tape and the sticker sheet. The place where the sticker (s) come must be made with, for example, gasoline, Dasty or Glassex well, dust and grease-free. It is useful to apply water with a few drops of washing-up liquid to the surface with a plant sprayer.
The reason for this is that the sticker is still easy to remove and can in any case be gently moved back and forth. If you are satisfied with the position of the sticker or striping, the water under the sticker can be gently rubbed away. Do this carefully with ironing movements and make sure you do not enclose air bubbles. So always work to the sides of the stickers. Because the chance that the sticker will tear or crease is certainly present. A rubber rake or, for example, a bank card can be used for rubbing so that the air is driven well under the sticker. But at least rub it so flat. possible. The sky must have every chance to dodge.
If you believe that the sticker is in place, the foil can be removed. Feel free to wait a few hours for this to ensure that the sticker adheres well to the substrate. Allow everything to dry thoroughly after applying the sticker or striping.
Remove stickers applied to the car - striping
Even after years, removing applied stickers or striping is possible in various ways. for example, you can try this by heating the sticker with a hair dryer. Do not use a paint burner. It removes more than the sticker. Injecting with WD40 is a secret tip. But whatever you do: patience is the most important thing. You can remove the glue residues with white spirit. Before you start removing the sticker or striping, it is advisable to wash your car first so that the dirt on the car does not cause scratches when removing the adhesive residue.


And you will find great retro stickers & other things on https://www.isaydingdong.co.uk/