By the long two-year restoration and better parts were available and I decided to continue with batteries from a Tesla Model S. The place for the controller had been determined in the meantime and it came on the right side. Then initially just borrowed a battery module to test.

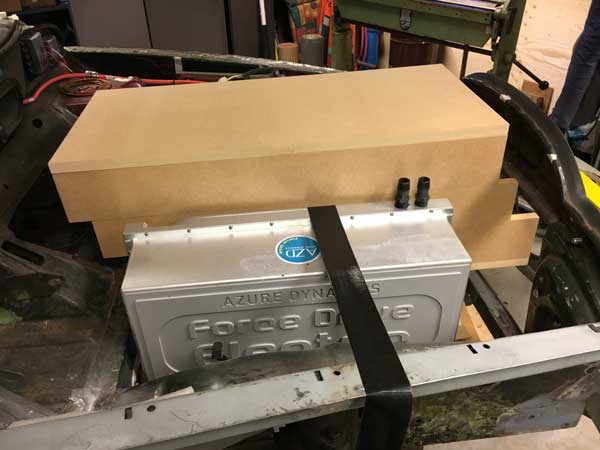
In practice, it was quite long and heavy even though you know the sizes from the documentation. Fortunately, a Volvo Amazon has a nice convex hood and three modules fit slightly in the front. Made a mockup with MDF to do some puzzling.

The original stove must then give way. However, that is not much of a problem because it already did not excel in blowing power and a new stove with heating element was already planned anyway.
Optimal weight distribution?
Three modules in the front and the rest in the back would fit, but is it also ideal? Only 2 modules and 6 at the rear could also be used.
In the end, to obtain the E (electric) number plate, the car will have to undergo an RDW inspection in Lelystad and, among other things, have to pass a road test.
According to BMW, a 50:50 front / rear weight distribution is ideal for optimal and agile handling. Time for weighing in practice and doing some math.
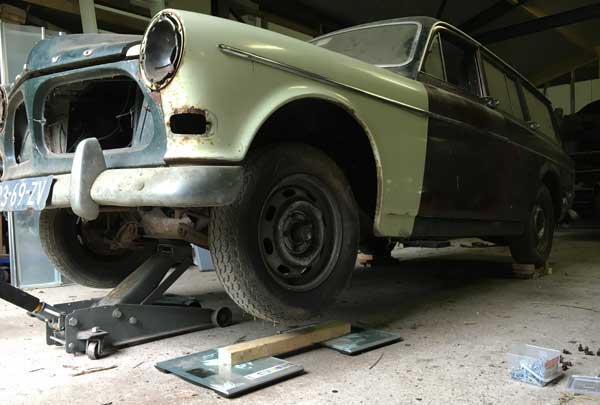
Eventhough I had already weighed my own car, just to be sure just a Amazon combination without engine and body, etc. weighted. Unfortunately I do not have nice scales such as those used in motorsport, but in this case four personal scales with a capacity of 200 kg each are also fine. That way I could weigh the car as a whole in two steps.

The results: front axle = 350 kg, rear axle = 550 kg, so total = 900 kg.
In addition to an empty and stripped Volvo Amazon combi, I also weighed a complete and driving Volvo Amazon combi on LPG.

The results: front axle = 558 kg, rear axle = 715 kg, so total = 1273 kg.
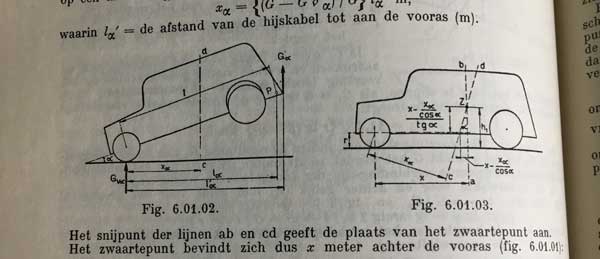
To complete the picture, I also weighed a separate gasoline tank, separate gearbox and a complete engine with accessories and gearbox. Then I was able to use the weight of the controller and battery modules to calculate
| Weight | % on the front axle | Center of gravity | |
|---|---|---|---|
| Standard Amazon combi on LPG | 558 + 715 = 1273 kg | 44% | 1,14 m for the rear axle |
| Electric combi batteries 5/3 | 551 + 689 = 1240 kg | 44,4% | 1,16 m for the rear axle |
| Electric combi batteries 6/2 | 526 + 714 = 1240 kg | 42,4% | 1,10 m for the rear axle |
| Maximum load in accordance with type approval | 750 + 1050 = 1800 kg | 41% | 1,08 m for the rear axle |
The DC / DC inverter, cooling system, battery bins, and so on add some weight. It is estimated that he will be 100 kg above the standard Amazon combi on LPG. The majority of this weight is added in the front, so that is beneficial for the weight distribution.
The ideal distribution is therefore 3 battery modules in the front and 5 battery modules in the rear. With a Tesla, they are located under the floor, which has a favorable effect on the center of gravity. With me, they are in the front on top of the engine. So here also counted.

The result was that the center of gravity is 70 cm above the ground and, as previously calculated, about 1,2 meters in front of the rear axle. This seems relatively high and more than original so I'm going to mount a heavier stabilizer bar and adjustable shock absorbers anyway.
Mockup batteries for
After my separate MDF boards I also made a functional prototype with plywood.

Above the battery modules there is a slanted part so there is also room for fuses, battery management system circuit boards and a maintenance switch and relay. At the same time, the container must remain low enough for the windscreen washer hoses.
Prototype battery box behind
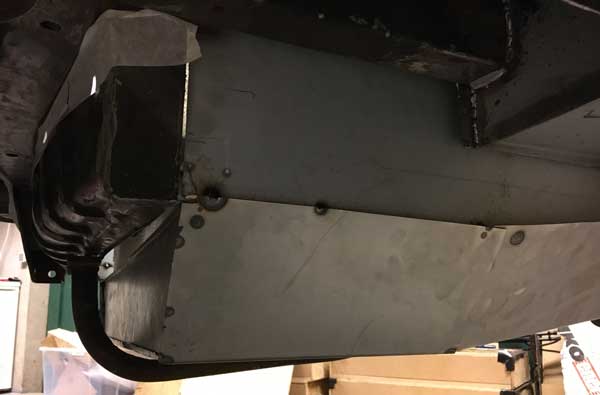
So 5 battery modules must be placed behind. Here the space of the spare wheel and the old gas tank lends itself well. The modification thus remains invisible from the loading space. With some pieces of plate I made a mockup / prototype.

Hereby I used old pieces of insulation as dummy models for the battery modules to check if I could exactly store a pile of 3 and a pile of 2.

All of that turned out to fit exactly while retaining the original long towbar. Moreover, in this way I meet the requirement of the RDW that batteries must be at least 10 cm from the end of the car.

I would like to keep that long towbar as a shock buffer and for functionality. It is all millimeter work to get it right. It is therefore not obvious to make it “just” in the work. Time to learn to draw 3D!
Charging batteries?
Charging the batteries can be done with alternating current, with a normal charging station or fast charging with direct current. I implement both possibilities. With direct current I use CHAdeMO so that I can charge quickly on the go at Fastned, for example. As can be read in 'Electric Volvo Amazon combi - restoration of the car part 3'is the quick charge connection in the right front screen and the normal charge connection in the back left behind the original fuel cap.

The chargers are in the car with normal charging, in my case left and right in the back behind the side walls. They then convert the AC voltage from the charging station into the DC voltage for the battery pack. The question remained which charge point?
The two built-in chargers together provide a power of 6,6 kW. Modern electric cars often have a higher power, but this is enough for me. Nevertheless, it is useful to have a smart charger. This way you prevent overloading of your grid connection. If you are cooking electrically, running laundry and charging the car at exactly the same time, it may be a bit too much and you have a chance that your main fuse will trip. This therefore requires 'load balancing' where the charging station serves as the closing point. There are many types of charging points that may or may not offer this option as standard or as an option. Like that of Lanova, but also the EVbox, Wallbox and Alfen die 50five.com for example offers. There are also more and more fast charging solutions for the home, but they are still relatively expensive.
As I wrote in 'Electric Volvo Amazon combi - the advantage of a long restoration'a car only drives really clean and sustainable if you can charge it with solar energy. In my opinion, a really good charging station is not only smart, but also green. However, there are few charging stations that offer this as standard. After some research I ended up with the Zapi V2. This is an entry level charge point in terms of price, but offers smart and green charging as standard.

This charging station has a Fast, Eco and Eco + mode. In Eco mode it is a normal smart charging station and takes into account the other consumption in the home. The Eco + mode is interesting if you have solar panels yourself. The charging point then looks at the yield of the solar panels and at the other consumption in the house and what is left over is used for charging the car. So you can charge with 100% solar power.
Next time
In the next episode (tag # old volvo-electric) more about the 3D drawing of the battery bins. Missed the previous one? Check the reports here on AMK for the benefit of a long restoration, restoration part 1, part 2 en part 3 or my plan for one electric Volvo Amazon combi or the initial conversion steps. Would you like to preview or view more details? The project can be found at www.oudevolvo.nl/ev-combi.


Don't forget to install a large loudspeaker with an amplifier. For a timelike engine sound of an amazon😎
With the right range of about 500km (real) would be a great lease car replacement😬 👍👋